Embark on this guide to unravel the aspects of account adjustments, managing notification preferences, and tweaking brand settings on Locad. With a few straightforward steps, you’ll gain control over your Locad settings like a pro.
Exploring Settings on Locad
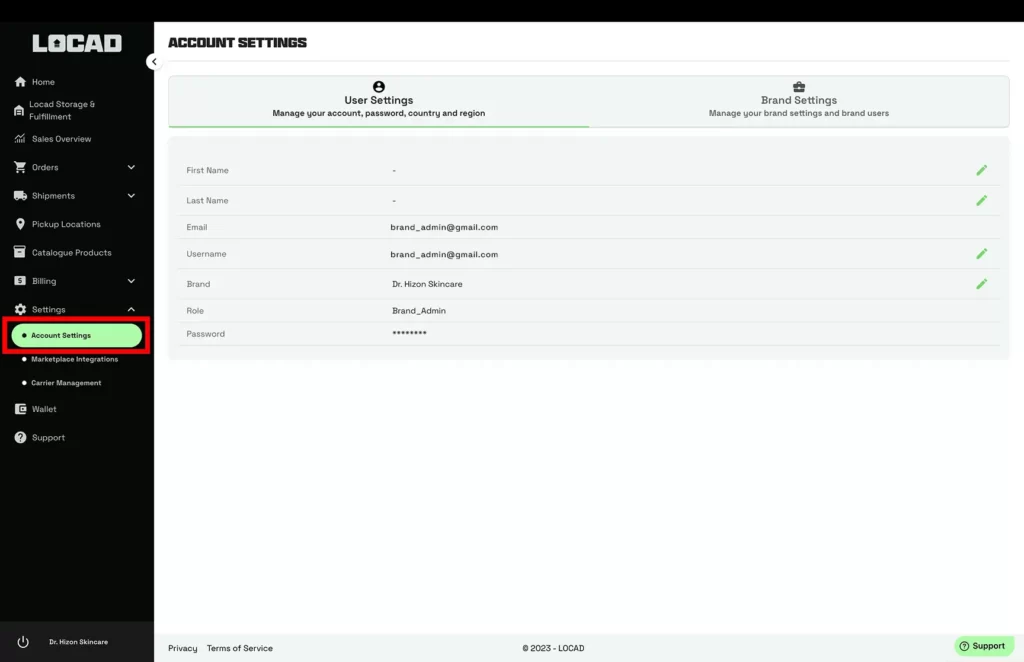
Once logged into the desired Locad account, look to the left-hand side menu. Here, the ‘Settings’ option is available, presenting two sections on selection: ‘Account Settings’ and ‘Marketplace Integrations’. This guide’s primary focus will be on ‘Account Settings’.
Diving Deeper: Brand Settings
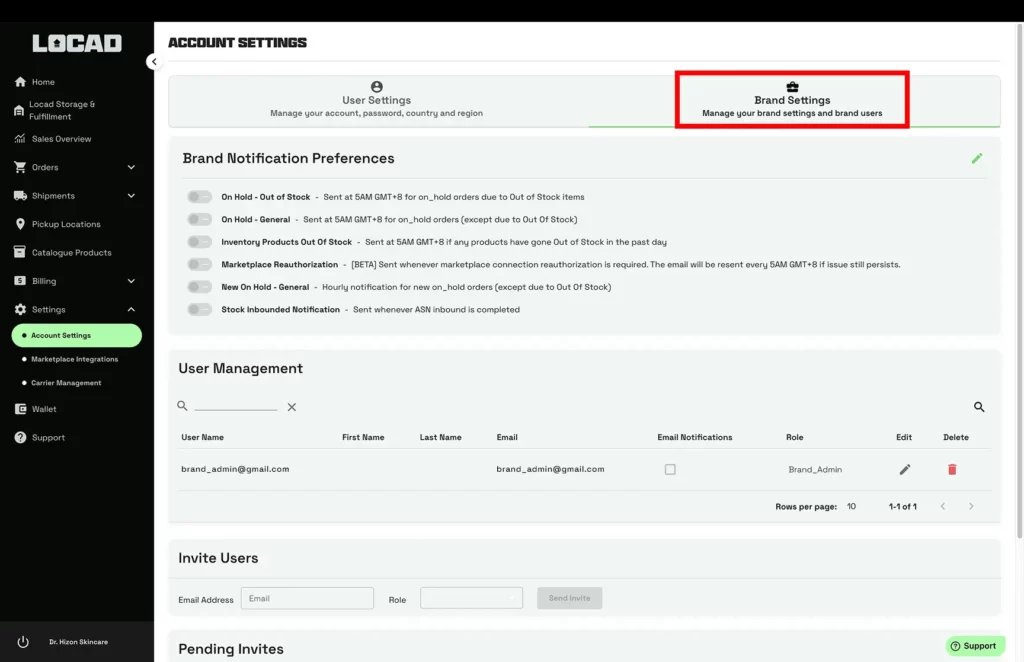
Within the ‘Account Setting’ is ‘Brand Settings.’
- In the ‘Brand Settings,’ the option to toggle between brands is available if your account has multiple linked stores. This function is incredibly useful for businesses overseeing several stores, facilitating seamless operations. You can conveniently access this feature from the dashboard, making your business management even more efficient.
Keeping Informed: Brand Notification Preferences

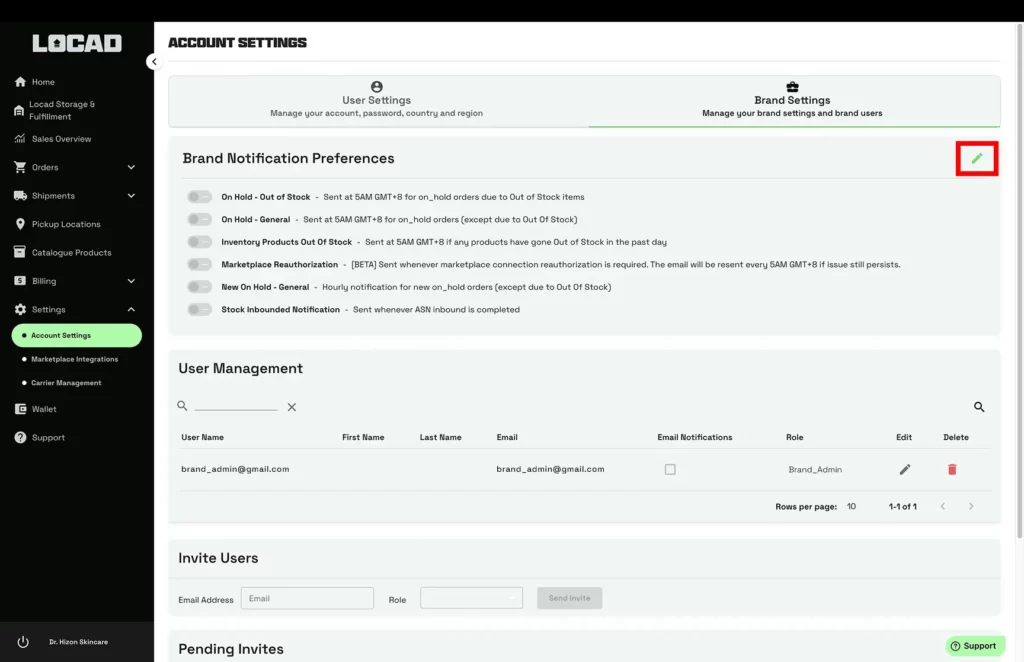
In the ‘Brand Settings’ Section, the ‘Brand Notification Preferences’ is crucial. This controls the notifications sent out by Locad. There are four types of notifications:
- ‘On Hold’ (Out of Stock): This notification is sent out at 5 AM (GMT +8) daily if any item of an order placed goes out of stock in the Shopify app.
- ‘On Hold’ (General): This notification is sent at the same time as the ‘On Hold’ (Out of Stock) notification, but it covers orders on hold for reasons other than being out of stock.
- ‘Stock Inbounded Notification’: This notification is sent whenever an ASN inbound is completed. This is more of a fulfillment feature, but it’s important to note.
- ‘New On Hold’ (General): This beta feature sends hourly notifications of new ‘On Hold’ orders, except those out of stock.
To edit these notification preferences, click the ‘Edit’ button next to the preferences.
Team Management: User Management

Under the ‘User Management’ section, it’s possible to search users by role, email, or username using the search bar. The search function is triggered by clicking on the ‘Search’ button.
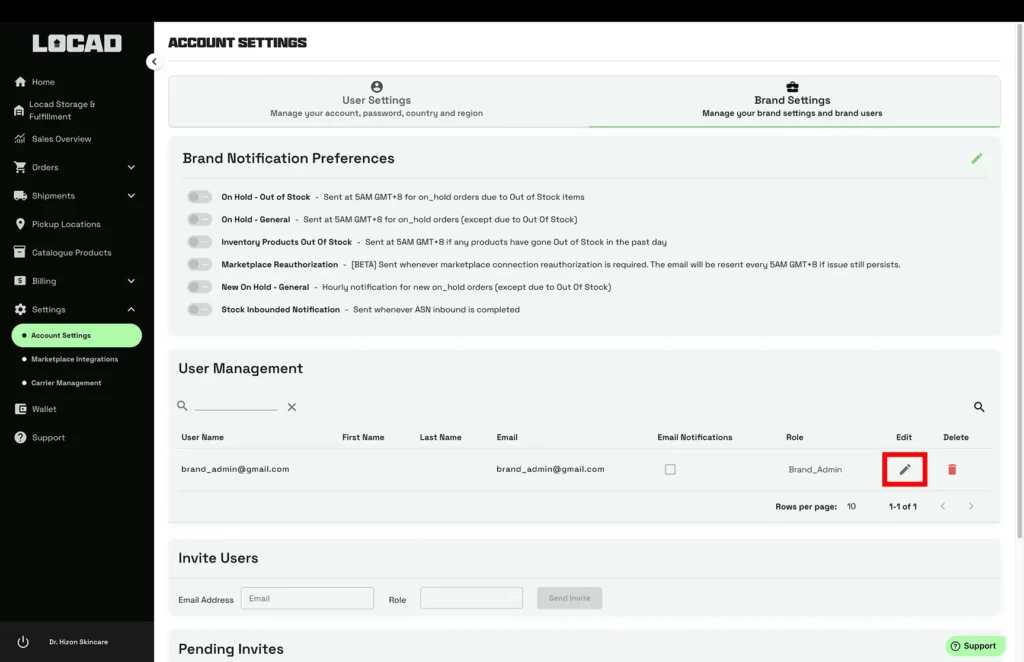
For each user, email notifications can be toggled on or off. User roles can be changed by clicking the ‘Edit’ button next to the user’s details.
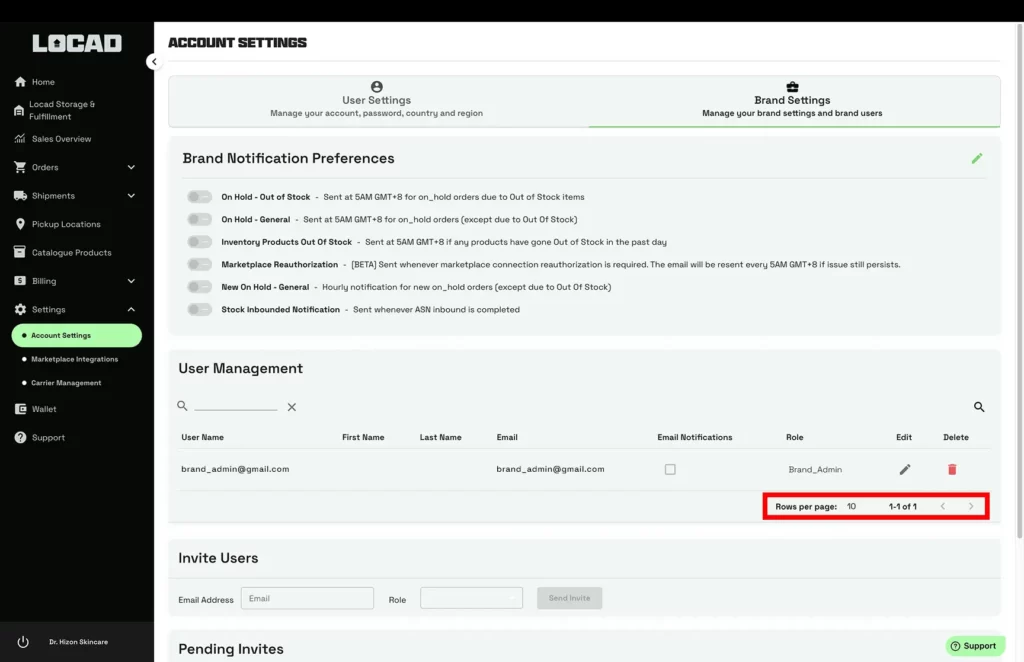
Pagination is available for viewing users and invites, allowing a specified number of users or invites to be viewed at a time.
Mastering User Invitations – Step by step

You will automatically be directed to the User Settings. This is where individual user preferences can be managed.

Look for and click on the Brand Settings tab within the User Settings.
Scroll down until you see Brand Notification Preferences.
You will find the User Management section below the Brand Notification Preferences.
Under the User Management section, you’ll see the Invite Users option.
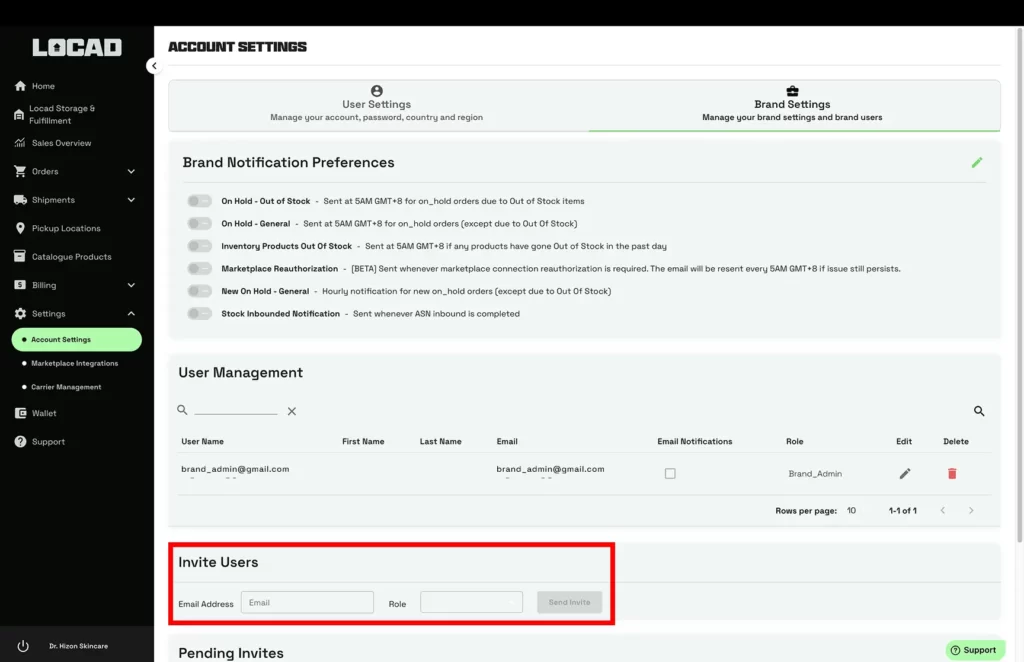
Under the User Management section, you’ll see the Invite Users option.
In the Invite Users section, type in the email ID of the user you want to invite. Select the user’s role (for example, Brand Analyst).

Once the details are entered, click on Send Invite. The invite will be sent and is valid for 15 days.
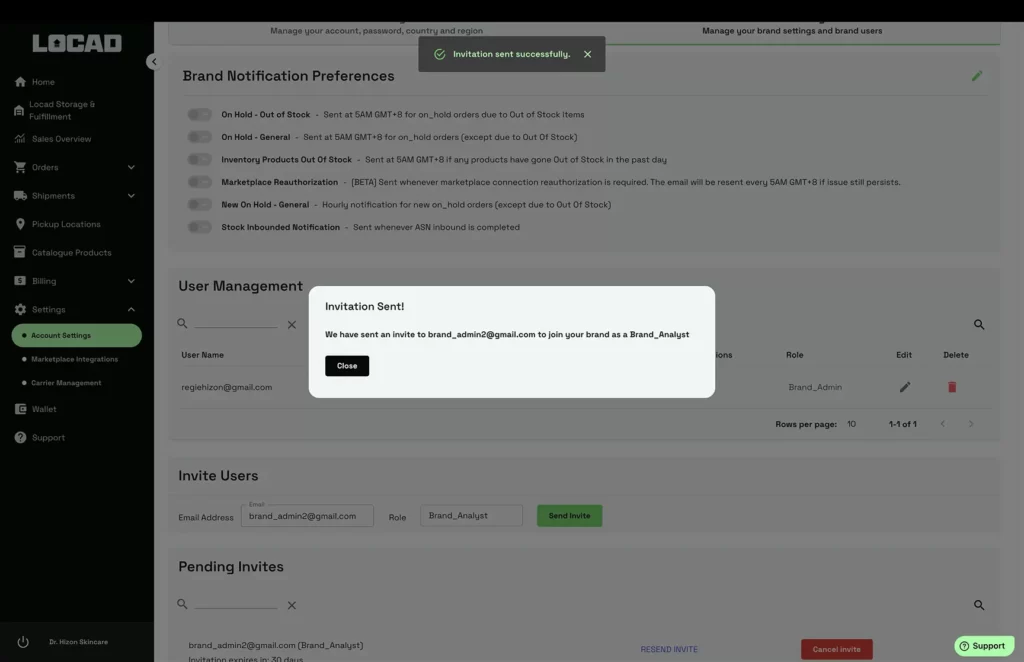
After sending, you’ll have the option to Resend or Cancel the invite. Use the search function to filter out specific invitations if needed.
Commanding Control: Cancel Invite
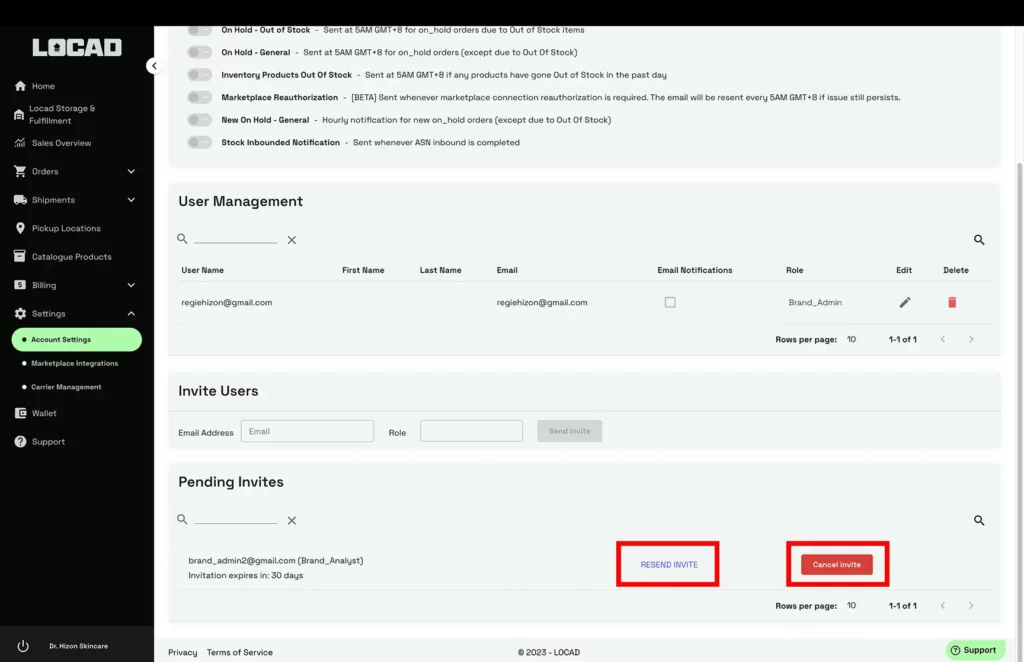
Locad provides the ‘Cancel Invite’ feature, allowing you to revoke previously sent invitations. To utilize this, simply locate the ‘Cancel Invite’ button adjacent to the pending invitation and click on it. This allows for efficient management of your pending invitations.
Diving into Roles: Brand_Admin and Brand_Analyst
A key part of user management is understanding user roles. Two primary roles within Locad are Brand_Admin and Brand_Analyst.
- The Brand_Admin role has full permissions and access within the brand’s settings on Locad.
- The Brand_Analyst role, on the other hand, has limited access, primarily to view and analyze data. On this role, notification settings cannot be adjusted and brand analysts cannot invite or edit any users
Navigating with Ease: Switching Between Brands
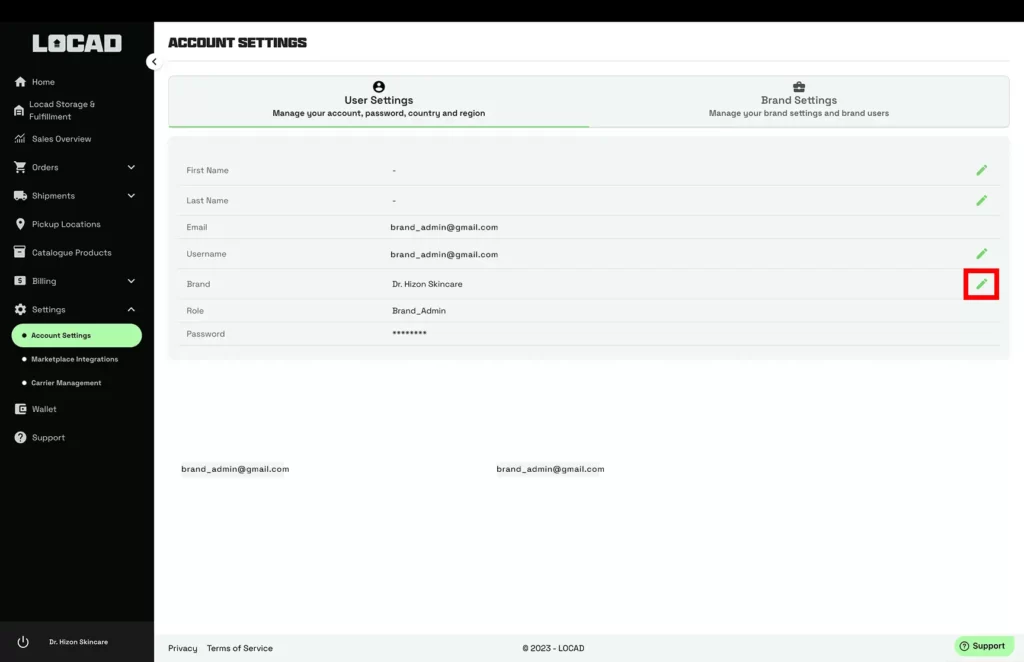
One of the key features of Locad’s interface is the ability to seamlessly switch between various brands linked to a single account. To do this, navigate to ‘User Settings’ and select ‘Brand’. This flexibility ensures efficient management across multiple storefronts.
Stay Informed: Email Notifications
It’s essential to note that all Locad notifications are delivered directly to the email address provided during the sign-up process. This ensures that you’re always up-to-date with the operations and updates of your stores.
Note
This guide will be updated as new features are rolled out, and any changes are made to existing functionalities.
We’re Here to Help: Locad’s Support
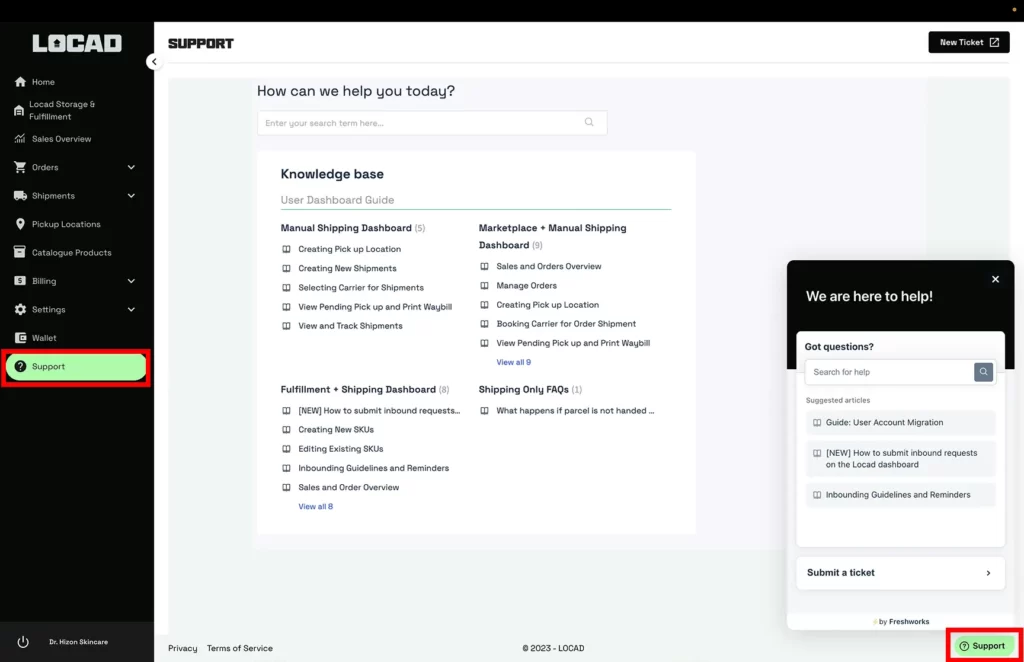
In case of a hurdle or if you simply have a question, there’s no need to worry! Our readily available support button is stationed at the bottom right corner of your screen. A quick click is all you need whenever assistance is required. Our goal is to ensure your journey with us is seamless and trouble-free.
Navigating Deeper: Your Journey with Locad Continues
Kudos on successfully grasping the nuances of the settings section within Locad. Yet, this is just one facet of your expedition with us. We have amassed a collection of guides and resources to bolster your understanding and utilization of our platform. With the knowledge you’ve garnered from this guide, you can delve into these resources and further refine your business operations with Locad.

